Showing posts with label Home Improvement. Show all posts

Tuesday, April 10, 2012

Carpet to Hardwood Flooring


Carpet to Hard Flooring
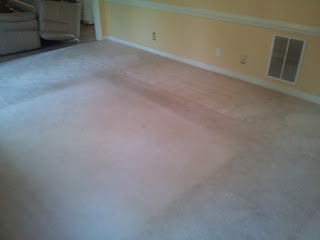
area where rug was is still the original color

When we first bought the house, it had spotless, almost new carpet.  Having 2 dogs and friends constantly in and out of the elements, changed the condition of this once bright fluffy carpet, to matted up stain patches in a matter of months.

The door to the rear deck steps into carpet, and paw prints and the remnants of lost battles to stains were starting to become a norm on the carpet.

To combat the dirt stains, as well as ease some of the cleaning that was needed, almost daily, I decided to install hardwood flooring.


Looking at several options and having installation can make a flooring job quickly climb into the thousands of dollars... I decided to give this a try and save a few bucks.


At the hardware store, the clerk pointed out that the same reason I was going to hardwood, would soon ruin my hardwood floors... dog nails and wood floors don't mix.

After a quick internal bout, I decided to go with "Laminate." It doesn't even sound the same.... takes a bit of the allure from it, but decided on dogproof "PergoMax" in Newland Oak.

First step to the transformation is getting the carpet up. Mine only had one hold-down transition and went pretty easy. I rolled up the carpet, and exposed the padding and tack strips.

Ripped and rolled up the padding in similar fashion to the carpet, and removed the tack strips to prep the surface for the laminate.

Had to make sure to remove ALL staples left behind by the padding. Not doing so can cause bumps or uneven surfaces on the finished floor when the new plank is laid over top.


Clean and vacuum entire surface to pick up dust, as well as anything that may potentially unlevel the finished floor.


Pick a direction for the planks to run (usually the length of a room) and start laying the planks down.

The leader planks in this case needed to have the locking "nose" piece trimmed off to sit flat against the wall.


Quick Note: Make sure to get an installation kit ($20) if you're going to do laminate. The kit comes with squares, spacers and brackets necessary to tighten the planks against each other. Laminate is brittle and you could break the ends without using one of these kits.


Work your way down the wall, clicking the pieces into each other. Once you get to the end of a row, cut your plan to size, and begin the next row with the remaining piece of that plank to avoid excess waste and give the floor and more realistic "wooden" look.

This type of floor does not need to be nailed or glued (unless being used in a kitchen or bathroom, and then for water proofing purposes), and floats on the floor, with gaps on all sides to account for any expansion/warping.

At the end of the day, I spent approximately $700 in materials and about 9 hours of labor over the span of two nights to complete, but the results speak for themselves:


Work all the way down to the end of the room to complete

Finishing strips and thresholds complete the look and maintain the "floating" design of this type of floor

Wednesday, February 1, 2012

Laminate to Tile Installation Part 1

One of the first things I did upon closing on the purchase of the house was walk in, find a joint seam for the existing (and hideous) blue and white linoleum, and started ripping away.

Existing Floor Removal

One thing I would recommend to anyone about to embark on a flooring project, is to invest in a good pair of cushioned knee pads.... trust me


You can see the first rip (above left) by hand into the linoleum. The first night, I decided the extents of the new floor and using a sharp utility knife, scored lines at the doorways where the linoleum would remain. I then removed the shoe molding, but left the baseboards to allow easier access to the edges of the vinyl.Without much prep, I started the process of cutting slits into the linoleum, and rubbing it with warm water to loosen the adhesive, then pulling it by hand. At about 6 AM, I called it quits and realized that I was probably doing it wrong.

The next morning and after some research, I went to my the hardware store and after asking the "knowledgeable" staff, they pointed me towards a scraper very similar to this:

After several hours of sitting on the floor scraping, it still didn't make sense that it would take as long as it was, so after a few calls to some friends and relatives, and  another trip to the hardware store, I then purchased a stand up floor model scraper 


This model finally yielded the results i was looking for, and allowed me to bear my body weight into it. The hand model became useful for removing anything left behind by the big one; however, it is not the option to start with.

Very warm water, a brush, and a clean cloth were essential in cleaning the adhesive residue, left behind by the scraper, off the sub-floor.

It is important to fill/sand any gouges that may have been cause during the removal of the old flooring so the new vinyl tile does not sink or protrude at those points.

The sub-floor should look like this once the vinyl and all adhesive has been removed 


Welcome!

Hello!

My name is Danny and I just bought my first house.

I have a huge imagination and like to figure out a lot of projects, which sometimes leads to a little bit of chaos, but it allows me to learn what to do and more importantly what NOT to do when taking on home repair projects. I hope that others can take my experiences and learn from them, as well as share any knowledge or advice from previous or current DIY projects.

Not much to say on this as of yet, but be on the lookout for additions of previous projects (vinyl floor tile, replacing shoe molding, DIY flat panel wall mount) as well as upcoming project (faux granite countertops, master bath remodel, etc.)