Finishing the Surface
After all of the surface prep work was completed, you have to prep the surface in accordance with the type of tile you are using. For vinyl tile, it is recommended to use lay a latex primer for better adhesion to the sub-floor. I went with this one from my local hardware store:
The latex primer can be applied full strength, or mixed depending on the condition (amount of cleaning done to floor) of the sub-floor. I used a 5 gal. container, a "roller tray" (that can be mounted to the edge of he paint bucket), and a 6 inch high density foam roller attached to a broom handle for comfort.
 |
| Putting down the latex primer |
The set time for the primer is approximately 2 hours, before tile can be laid down.
Putting Down the Tile
Once your surface is ready, hopefully you have your tile and pattern chosen. I chose to go with a "Crushed Shell" tile color, and an offset pattern using 18" and 12" tiles.
I wanted to give the floor the look of "real" tile by grouting between the tiles, so i go a bag of "X" tile spacers to set between the tiles to ensure consistent spacing.
 |
| What I should have gotten |
Once I laid a couple of tiles (with the backing still on) to verify the pattern and spacer fit, I went against standard convention of drawing lines and figuring out the center of the room, etc.... and just went and picked and edge and lay a tile down. My reasoning for this was my offset pattern would change and there really wasn't any advantage that I could see.
 To lay the tile, just peel the backing back and place the tile down, and make sure that you use consistent even pressure to seal the tile. Vinyl tiles have a specially formulated adhesive that further activates when pressure is applied to it. You could use a rolling pin and bear your body weight, rent a tile roller, or use a roller that requires your body weight. I went with the latter option for about $20.
After about 30 minutes of sitting on the floor tiling and rolling, I torqued it over a bit, and found out it had an unadvertised extensible handle. This extension made it much comfortable to apply pressure using my heel, while standing up; instead of awkwardly trying to push down and roll it back and forth.
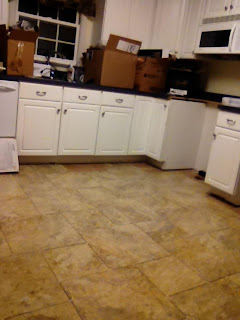
I tiled the centers of the room and left any tiles that would need to be cut for the end, but at this point, it was finally starting to look like a real floor:


After all of the middle tiles were down, It was time to start cutting the edges. After trying several methods of sizing/measuring tiles, ended up just using a square to measure the size the tile would need to be, making a pattern from cardboard and then tracing it on the tile using a china marker. Once the pattern was on the tile, a quick check to make sure it looks right and using a utility knife score the hard vinyl side against a straight edge. If scored correctly, the tile should break clean along the score line, and you just need to cut through the paper backing.
Once all of the edge tiles have been cut and placed, it is now time to prepare the floor for grouting.


No comments:
Post a Comment